Friday, June 17, 2011
Sunday, June 05, 2011
Bee inspection
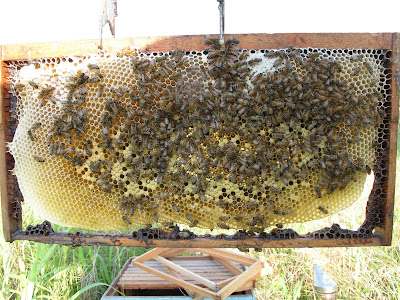
This morning I added a third deep to the 2 hives that were still at 2 boxes and checked in on the hive from the swarm. I took a picture of each of the combs they had, front and back. Three they drew themselves and one from the anchor. Click for larger images.

Saturday, May 28, 2011
Swarm inspection at one week.
Checked on the swarm that we hived one week ago. They had drawn out a about 2.5 frames. I saw eggs and saw the queen. So it's looking good.

The frame above has eggs which can be seen at full resolution. Also saw nectar.

The frame above has eggs which can be seen at full resolution. Also saw nectar.

The above frame is the one I added from an existing hive to help anchor the swarm and give them a population boost in a few more days.
Sunday, May 22, 2011
Honey Bee Swarm Caught
Homer caught a swarm yesterday 2011 May 21 from an asparagus patch. It was about half the size of a basketball. I gave them a frame of brood (mostly open) from another hive. The frame had a few queen cups.
Thinking I might feed them to help them get started.
Later in the day I checked the four older hives. Two had enough bees to add a third deep. Two were doing well, but still had enough empty space I figured I'd leave them with just 2 deeps for a few more weeks.
Also figure I should've given the swarm a frame of capped brood so they wouldn't need to feed them and they'd have a lot of nurse bees soon... maybe next time.
Sunday, May 08, 2011
Whole wheat roll recipe
This is how I make my rolls. You can vary the recipe however you want, but I have found whole wheat works best when the dough is wet and gets to spend some time in the fridge. (Cold wet dough is not as sticky.) Next time I make them I'll add some pictures or videos, but it might be a while because I will probably switch to pitas I can cook on the grill for the summer.
1700 g fresh very finely ground hard white winter wheat (I use a Wolfgang mill)
(grind extra for shaping the rolls and put it in the freezer)
680g water
680g milk (raw, whole)
170g honey (from our bees)
2 eggs (from our chickens)
140g butter (from raw cream)
2T SAF yeast
2.5 T sea salt
Procedure:
While the wheat is grinding, put the water, milk, honey, eggs and yeast into mixer (I use a Bosch universal with dough hooks.) Start adding the flour. After about half is added, pour in the melted butter and salt. Now make sure you got everything in there :)
Let the Bosch mix it for 10-15 minutes. It should be climbing up the center post of the mixer and very wet! Wetter than you'd ever want to work by hand.
Next put all the dough into a big pot, cover and leave a room temp four a couple hours or until the dough is rising well, then put it in the fridge. Ideally, you want to wait at least overnight before continuing and not more than a few days. The chilling and the time will make the dough less wet and develop the gluten more.
A few hours before you want to eat the rolls, butter your pans, get out the extra flour you ground and the dough. This amount of dough makes 64 rolls. I usually just keep cutting it in half till I get to 64... You'll need to use a little bit of flour for shaping the rolls, but try to use as little as possible. Whole wheat flour needs to be much wetter than white flour products.
Okay, the shaping of the roll is very important: take the dough and start stretching the top of the roll around to the bottom. Your goal is to make the top a stretched skin. Keep doing this until the dough starts to firm up a little (maybe 30 seconds?) If you are not familiar with shaping dough find a few youtube videos on it. The key things for good 100% whole wheat are wetness and shaping, so put your effort there.
Let the shaped rolls rise until doubled. This can take a while since the dough was cold, so be patient. It's not unusual for it to take a couple hours. They WILL rise!
Preheat oven to 350 F. Make sure it is very well preheated. Bake the rolls for about 20 minutes. Let them cool as long as you can stand it before eating.
Let me know if you have questions or suggestions.
Tuesday, July 06, 2010
Ready to forage and another box
This is the nuc from Lloyd this morning.
Just need a sunny day to work the beees.

Okay, managed to get out there yesterday morning (July 7) and give them another box. I was looking through a few frames to check for good brood pattern and actually saw the queen! It was the first time I've seen a queen in real life (honeybee anyway.)
I took one of their frames of capped brood to give a boost to the hive that had lost its queen earlier. I was hoping to see that the queen had started laying by now and she had. Yay again. It was the same feeling I got when I first started gardening and my seeds actually sprouted. Such a shock to see how nature works if you let it.
Now if we can figure out how to get rid of squash bugs easily.
Subscribe to:
Posts (Atom)


